Pixaflux
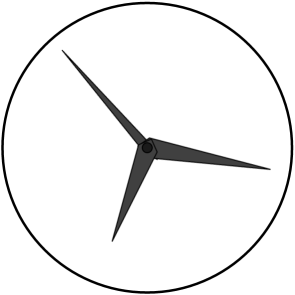
Tutorial Clock
In this tutorial, you will learn how to use common attributes to control the hands of a clock using hours, minutes and seconds number attributes.
Open the file Clock.pxf.
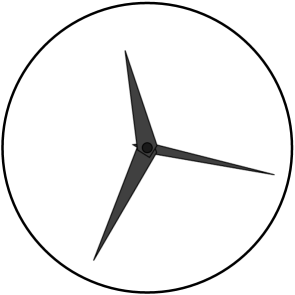
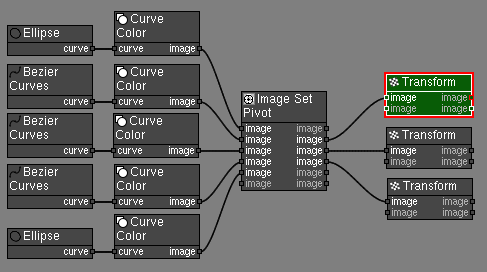
This PixaFlux project contains 5 images created with the Ellipse ![]() and Curve Color
and Curve Color ![]() nodes that are contained in the
nodes that are contained in the ![]() Create nodes area.
Create nodes area.
Set the Position and the Pivot of the clock hands
If you open and check the Info Window on the clock image you'll notice their position is set to the left-bottom corner, and their pivot is set at [0.0, 0.0]. You can add a Transform node on the hands with Space local rotation and see how the hands rotate around the left-bottom corner:
(In order to compose the images for this tutorial a Mix node and a Resize node have been connected to the final clock images.)
For the hands to rotate correctly we need their position to be set at the center of the clock and their pivot to be set to the relative location of this position on the image. All this can be achieved with the Image Set Pivot node.
Create an Image Set Pivot node


 .
.Connect the all the Curve Color nodes to the Image Set Pivot node. The Image Set Pivot node supports multiple input and multiple outputs.
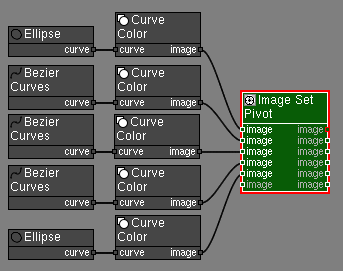
In the Attributes Panel set the Pivot attribute to [300, 300]. This will set the position of all images to [300, 300] and the pivot of each image to the relative position of [300, 300] from their left-bottom corner.
For example, before the Image Set Pivot node the hours image was at position [278, 278] and its size is [45, 225]. The Image Set Pivot sets the position of the image to [300, 300] and the pivot is computed to mantain the hours image on the same place relative to the canvas and the other images. The pivot is computed as:
((ImagePosition - ImageBottomLeft) / (ImageSize))
x = ((300 - 278) / 45) = 22 / 45 = 0.489
y = ((300 - 278) / 225) = 22 / 225 = 0.098
The Image Set Pivot node applies the same position to all input images and sets the pivot for each individual image.
Create a Transform node

 .
Connect the hours [Image Set Pivot › image] to [image › Transform].
.
Connect the hours [Image Set Pivot › image] to [image › Transform].Set the Space attribute to local. In local space the Transform node rotates and scales images around their pivot.
Duplicate the Transform node by holding down the Shift key and moving the node in the viewport. Connect the minutes [Image Set Pivot › image] to [image › Transform].
Duplicate the Transform node and connect the seconds image to this new node.
Edit the rotate angle of the Transform nodes to test how the hands rotate around their pivot.
Add the Common Attributes
Create an Attributes node

 .
.
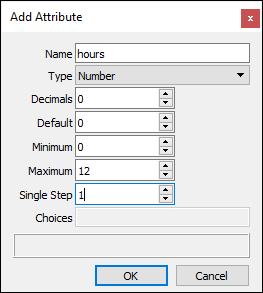
Add the hours attribute. In the Attributes Panel click the Add Attribute button. In the Add Attribute window set the following values:
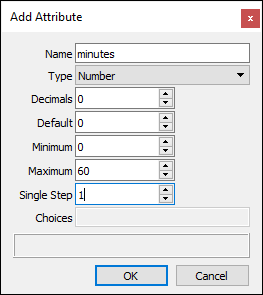
Add the minutes attribute. In the Attributes Panel click the Add Attribute button. In the Add Attribute window set the following values:
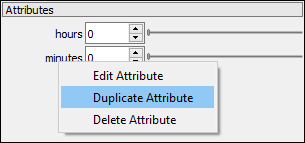
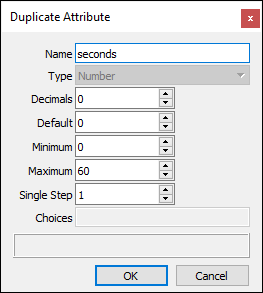
Right click the minutes attribute to display the attributes panel context menu. Click Duplicate Attribute and in the Duplicate Attribute panel set the name to seconds and click ok.
Now that all attributes have been defined connect them to rotate the clock hands.

Convert Time to Angles
Now we'll use some ![]() Math Nodes to convert the hours, minutes and seconds values to the angles for the hours, minutes and second clock hands. There are two ways to do this:
Math Nodes to convert the hours, minutes and seconds values to the angles for the hours, minutes and second clock hands. There are two ways to do this:
Hours, minutes and seconds are converted to an angle individually. This way the 3 hands make a discreet jump or tick from one time segment to the next one. For example, the hours hand stops exactly at 12, 1, 2, 3... etc.
Hours, minutes and seconds are combined to a decimal time and this time is broken again into decimal hours, minutes and seconds. This way the 3 hands sweep across the dial.
Real clocks sweep smoothly across the dial so this is the type of motion we'll implement on this tutorial.
Convert time to decimal time.
To convert the hours, minutes and seconds to decimal time we'll use this equation:
~~~~ time = hours + (minutes / 60) + (seconds / (60 * 60)) ~~~~
Create a Number Divide node

 .
Connect [Attributes › minutes] to [dividend › Number Divide].
Set attribute divisor to 60.0.
.
Connect [Attributes › minutes] to [dividend › Number Divide].
Set attribute divisor to 60.0.Create a Number Divide node
.
Connect [Attributes › seconds] to [dividend › Number Divide].
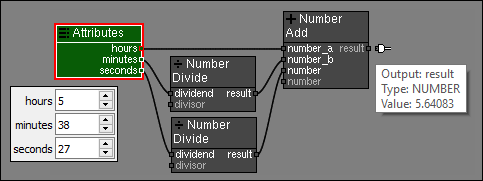
Set attribute divisor to 3600.0 (60.0 × 60.0).Create a Number Add node
 .
.Connect [Attributes › hours] to [number_a › Number Add].
Connect the decimal minutes [Number Divide › result] to [number_b › Number Add].
The Number Add node supports multiple inputs. Inputs numbera and numberb are exposed attributes and the list of inputs is expanded when a new value is connected to the last input.
Connect the decimal seconds [Number Divide › result] number to the free [number › Number Add].
Convert decimal time to hand angles
To convert the decimal time to the angle for the seconds hand you'll first convert the decimal hours to decimal seconds. Then convert from decimal seconds to degrees. The clock hands rotate in clockwise rotation, and images are rotated by the transform node in counterclockwise rotation. For this reason you'll need to make the final value negative:
Using zoomcalc.com to test and simplify our math we get:
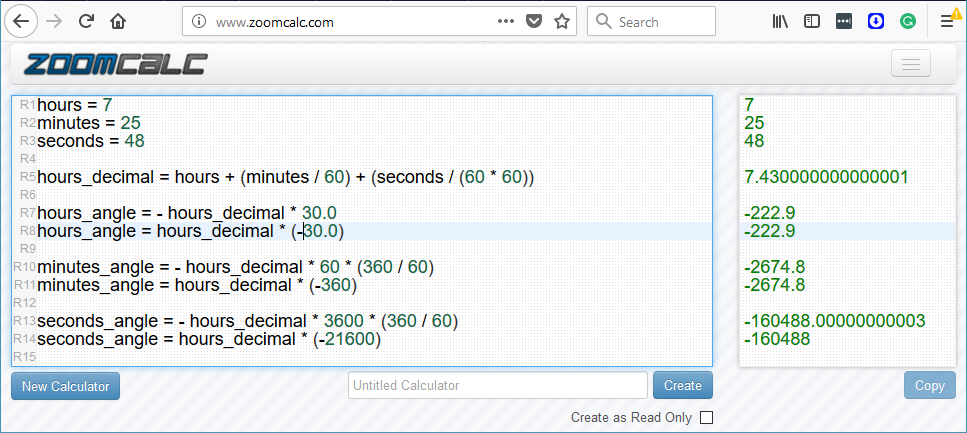
The minutes and seconds angles are larger than 360 degrees, but since these are rotation these values are correct and we can use them in the Transform node.
Create a Number Multiply node
 .
Connect [Number Add › result] to [numbera › Number Multiply].
Set attribute numberb to -21600.0.
Set the name of this node to Seconds Angle.
.
Connect [Number Add › result] to [numbera › Number Multiply].
Set attribute numberb to -21600.0.
Set the name of this node to Seconds Angle.Create a Number Multiply node
.
Connect [Number Add › result] to [numbera › Number Multiply].
Set attribute numberb to -360.0.
Set the name of this node to Minutes Angle.Create a Number Multiply node
.
Connect [Number Add › result] to [numbera › Number Multiply].
Set attribute numberb to -30.0.
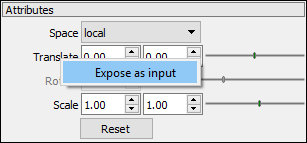
Set the name of this node to Hours Angle.Double-click the Transform node connected to the seconds hand image value to activate it and display its Attributes panel, right click the Rotate attribute to display the context menu, and click the Expose as input command.
Connect the [Seconds Angle › result] to [rotate › Transform].
The Transform node rotates the image by the angle define by the seconds attribute in the common Attributes panel, modified by the math nodes. The value set in the rotate attribute of the Transform node is ignored.
Right click the Transform node connected to the minutes hand image value. A Expose Node Attributes window is displayed. Check the rotate attribute and click OK.
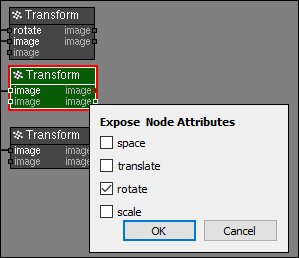
Connect the [Minutes Angle › result] to [rotate › Transform].
Activate the Transform node connected to the hours hand image value. Expose the rotate attribute. Connect the [Hours Angle › result] to [rotate › Transform].
Create a Mix node
 .
Connect all the clock image values.
.
Connect all the clock image values.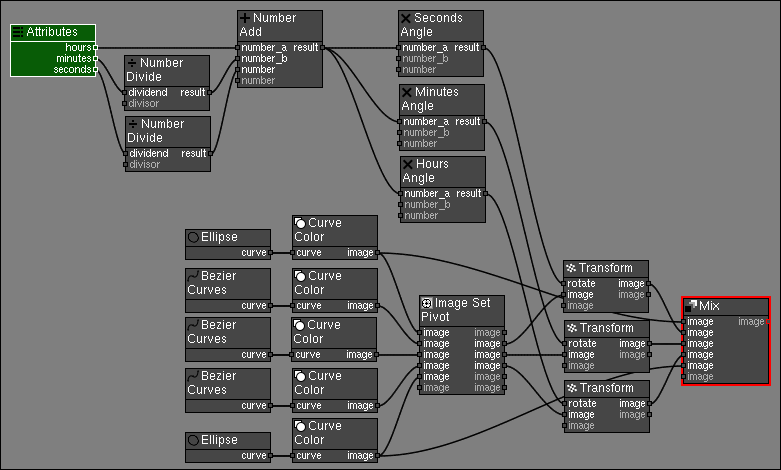
Creating a reusable Clock custom node
The Clock project is now completely configured to create a new clock image with the hands on the right time position using just the hours, minutes and seconds attributes.
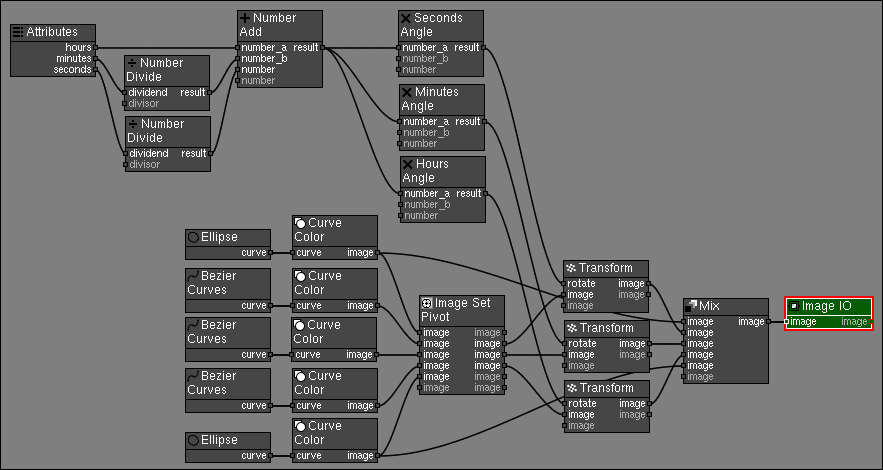
To reuse this node in other projects you can add and Image IO node that defines the output of the clock node, and the Attributes node will provide the attributes for the custom node:
Create an Image IO node
 next to the output of the Mix node.
Connect [Mix › image] to the [image › Image IO].
Set the hours, minutes and seconds attributes to 0 to display always a clock with attributes that reset to 0.
Save the project as Clock.pxf.
That's all. Now you can load this project in other projects using the Node Graph node.
Using the Clock custom node in other projects.
Go to the menu File > New Project > Empty
Create an Node Graph node
 .
.
In the Node Graph node attributes panel click the Path button and select the Clock.pxf project.
Double-click the node to reactivate the Attributes panel and display the Clock.pxf attributes.
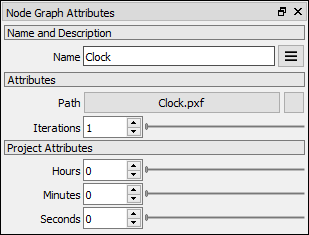
Modify the hours, minutes and seconds attributes a verify the the clock images are correct.