
Pixaflux
Generate - Checker
Left Toolbar > ![]() Generate Nodes >
Generate Nodes > ![]() Checker
Checker
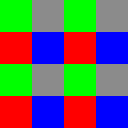
The Checker Node generates a checker image 800 px Width by 600 px Height. 16 colums by 12 rows compose the image. Each cell is 50 px Width by 50 px Height.
output
 Img
Img
Procedure
To create a checker image:
On the left toolbar choose Generator Nodes > Checker.
 >
> 
Drag the Checker icon into the Node Graph.

Adjust the attributes of the Checker Node to modify color, size, position.
Outputs
Img
A Checker image with final result.
Attributes Panel
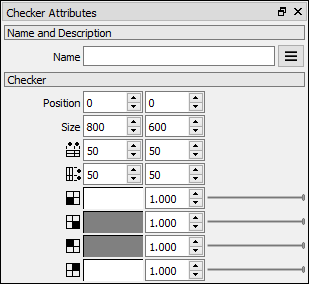
Position
Default values X:0, Y:0.
Image Size
Width Default: 800 px. Height Default: 600 px. Drag marquee at corners to change its size, or type values.
![]() Cell Width
Cell Width
Odd Column Width Default value: 50 px. Even Column Width Default value: 50 px.
![]() Cell Height
Cell Height
Odd Row Height Default value: 50 px. Even Row Height Default value: 50 px.
Color and opacity can be edited according the cell position determined by a square reference 2X2 cells each.
![]() Left Bottom Cell
Left Bottom Cell
Edit LBC Color and opacity.
![]() Right Bottom Cell
Right Bottom Cell
Edit RBC Color and opacity.
![]() Left Top Cell
Left Top Cell
Edit LTC Color and opacity.
![]() Right Top Cell
Right Top Cell
Edit RTC Color and opacity.
Video
Click here to watch How to add a Checker Node to your project
Guide
In this project we are gonna create a Checker image, edit it's size and colors, then blend it with a Linear Gradient. At the end, we are gonna add a border to the final image.
Click Generate Nodes button
 at the left menu.
Drag and Drop Checker Node
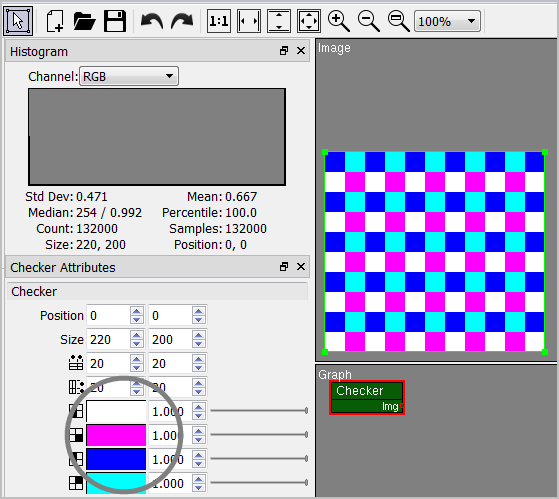
to Graph Viewport.In Checker Attribute Window, reduce Width Size from 800 to 220 [left box] and Height Size from 600 to 200 px [right box].
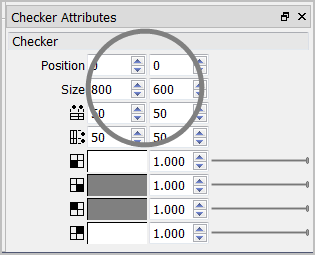

In Checker Attribute Window, reduce size of columns and lines from 50 to 20.
Edit Checker's cells color by clicking on top of each color window. In this example the opacity of each color cell is set to 1, but it can be decreased to 0.
Click Generate Nodes button
at the left menu. Drag and Drop the Gradient Node  to the Graph Viewport. Note in the Graph Window that the active Node is the Gradient one, and the Checker Node is gray, so it's image is not displayed in the Image Window. In the Gradient attributes adjust the Size to 220 and 200 to match the checker's image size. Set Point B to 220 as the end point of the Gradient. In this example the Gradient is gonna be Linear and there is not gonna be any pattern repetitions, so set Repeat: None.
In the left Menu click Compose Node
 . Drag and Drop the Blend Node
  to the Graph Viewport. Drag a connection from Checker's outlet to Blend Node's "Background - Bg-" input. Drag a connection from Gradient Node Output to "Foreground -Fg-" input. Reduce Opacity Value (set to 0.503) in order to blend the Gradient effect on top of the Checker image.
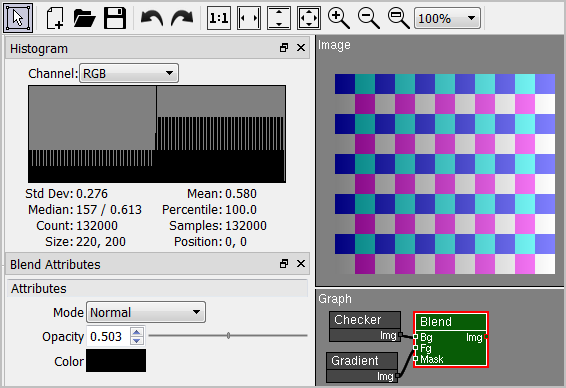
In the left Menu click Compose Node
. Drag and Drop the Border Node to the Graph Viewport.
In Border Attributes, increase size to 5 pixels, and change color.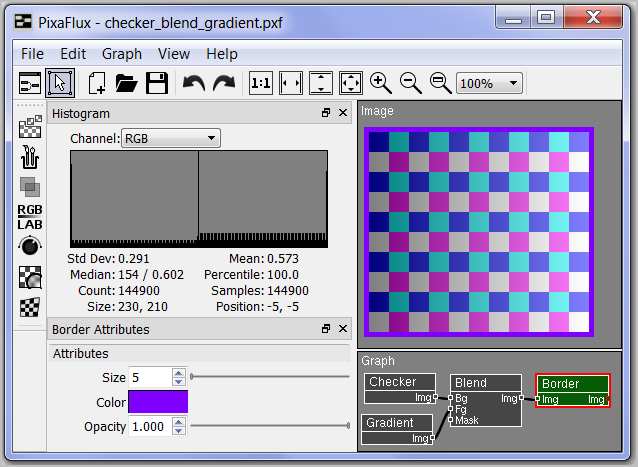
You might also be interested in:
Checker Images to Normal Maps